Say goodbye to moveable stoppers

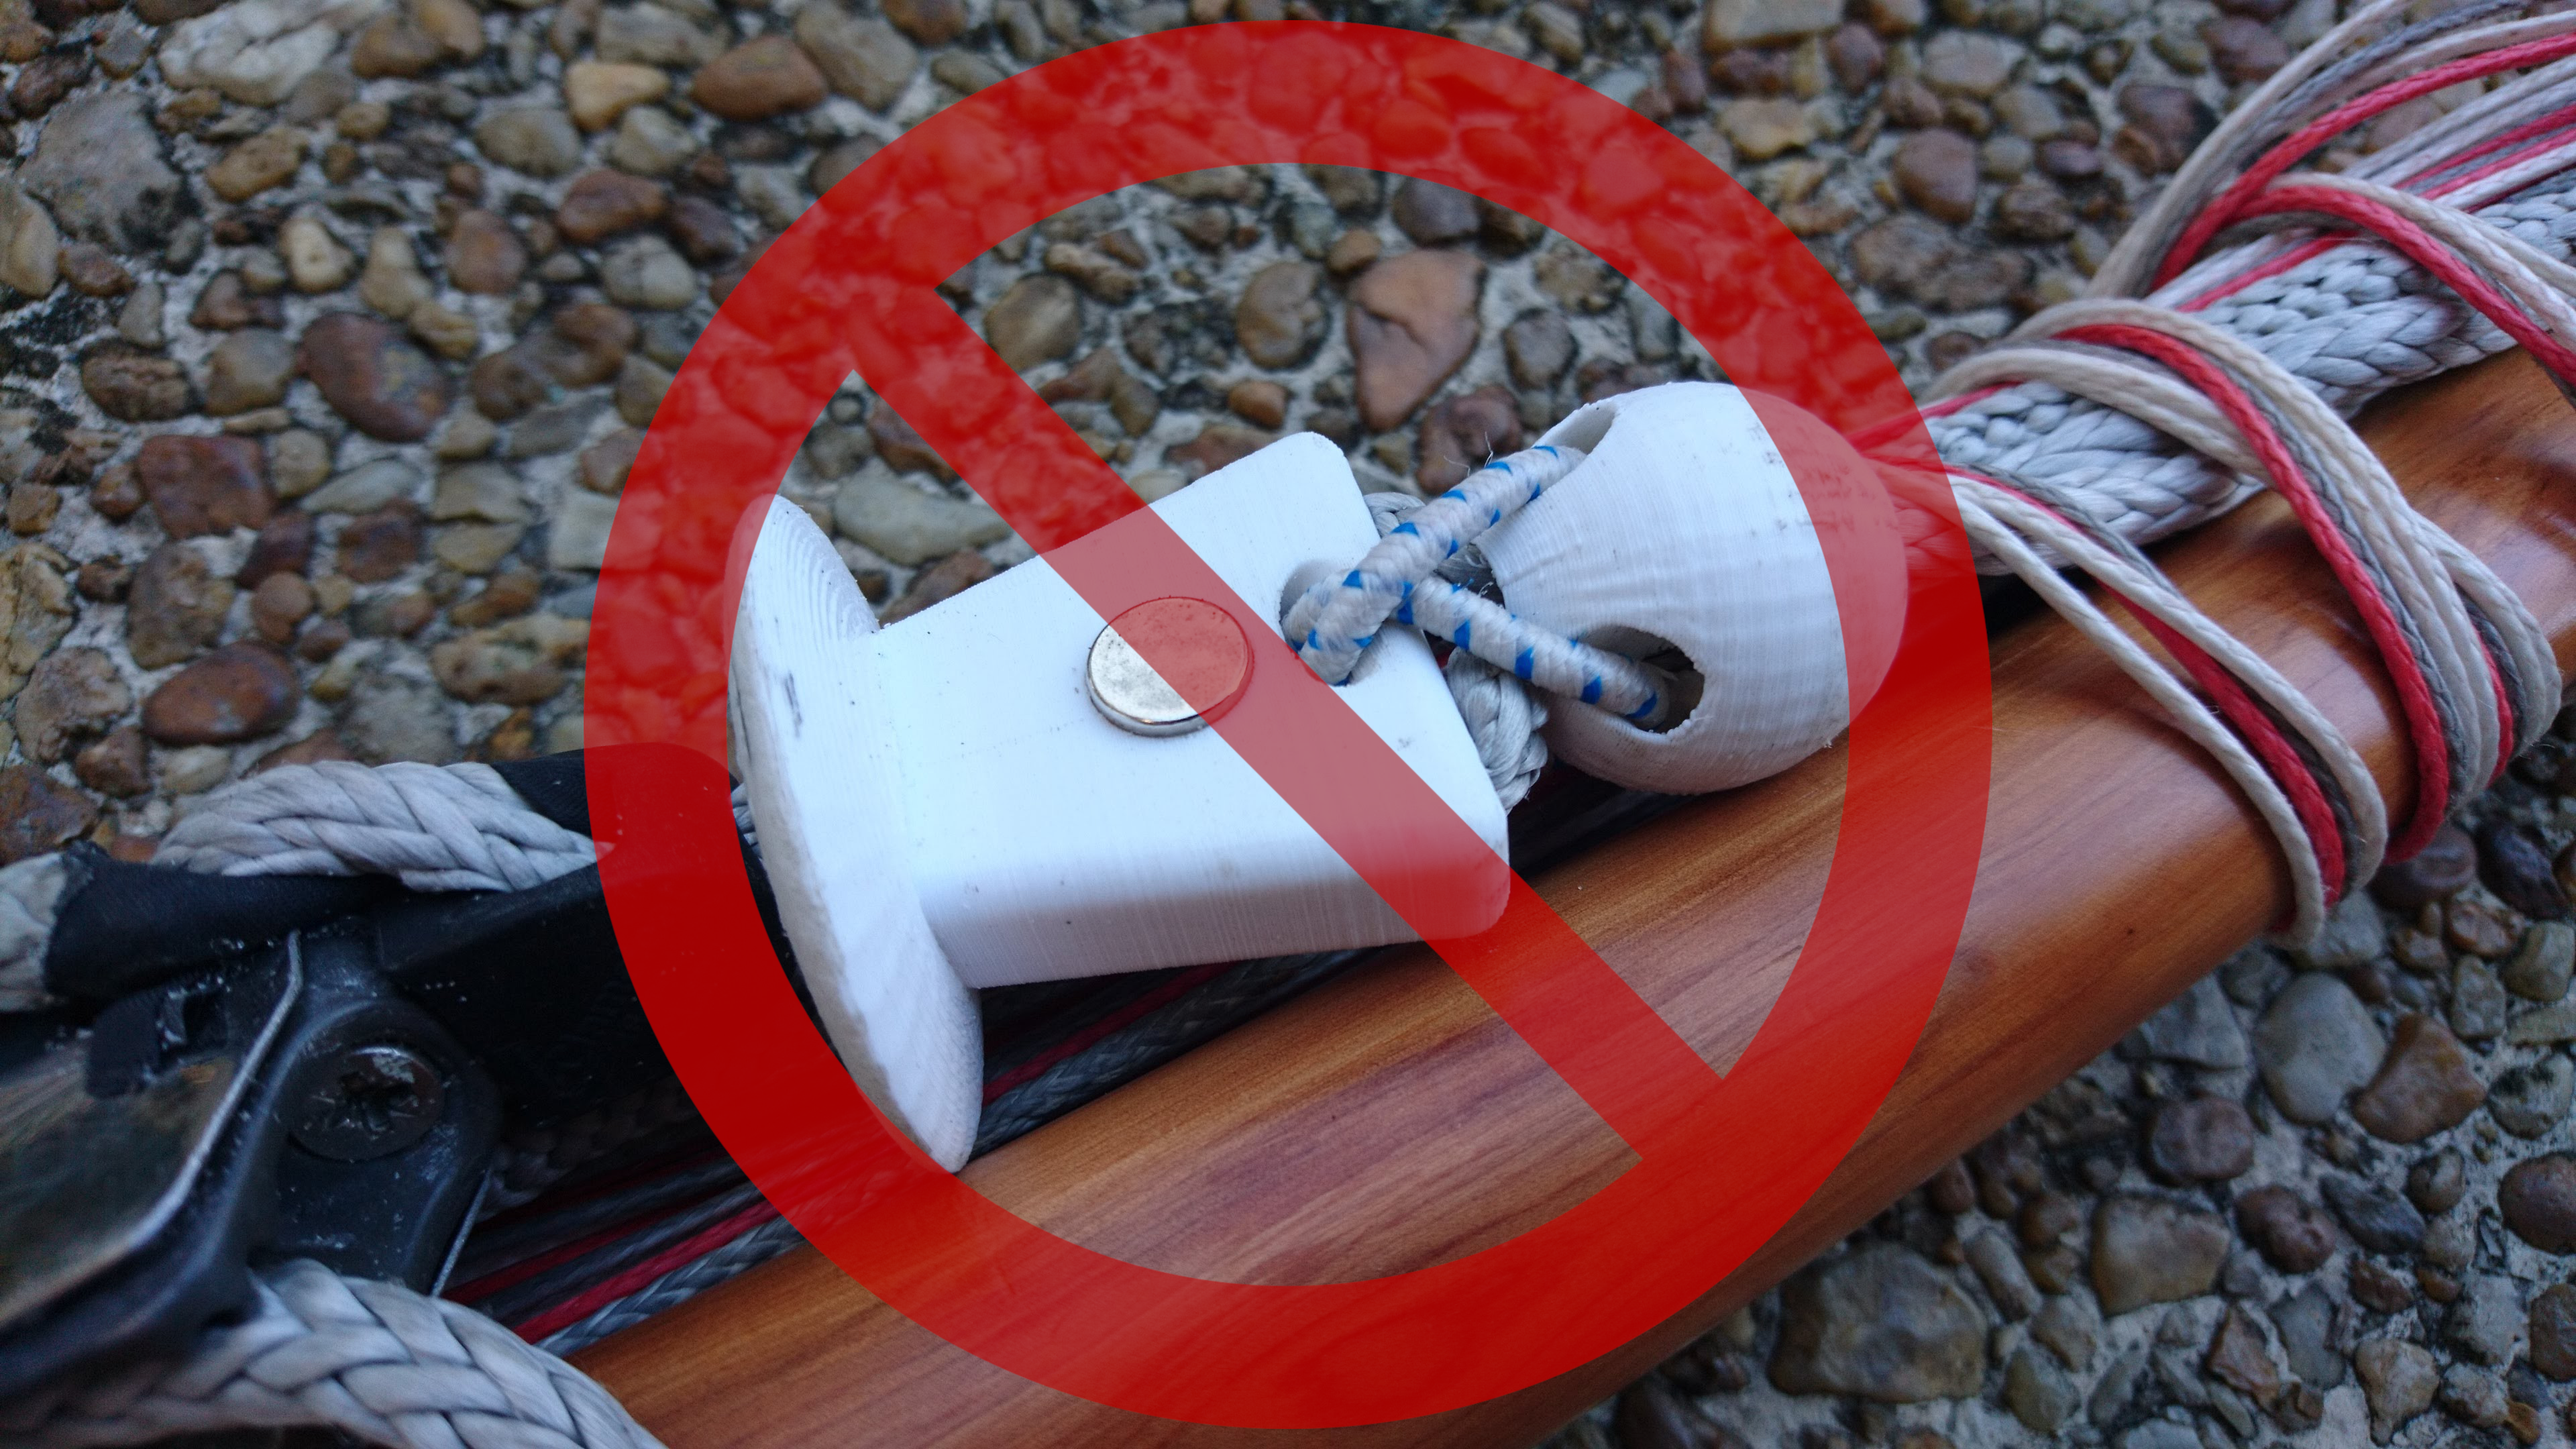
I think it’s time to say goodbye to a design I have been refining for the past 5 years. For quite some time I’ve felt the moveable stopper was critical part of a good bar. I’ve spent a lot of time learning how to machine them and how to 3D print them. I’ve enjoyed the design process and using the products of my labors. I think I’ve produced some good designs and I’m happy with the latest iteration, but for the past several months I’ve been thinking they are a compromise of both function and safety with only a moderate benefit. I’ve been flying with my stoppers pushed to the cleat since last Fall. Though they were installed, I was no longer moving them off the cleat.

I had noticed some years back that the most performant way to fly was to not rest the bar on the ball. Instead, I’d push the stopper a little further away than “optimal” and then hold the bar by the center about a finger’s width off the ball. This gave you the opportunity to pull in when needed or let out a little in a gust. Yet if you really needed to let the bar out in a gust it took a moment to shift your hand and push the stopper out. I was not able to make rapid changes in response to changing conditions. I did take advantage of the ball at times–two fingers on the bar end while the ball carried the bar load–but this was rare for me.
I think the nail in the coffin was last October when Steve Bateman asked me about Board Riding Maui’s Cloud Connection System. I had seen the videos before, but Steve’s question got me to watch it once more and I was reminded of the many things I liked about the design. What intrigued me the most was the passive safety provided by the massive bar throw. I wanted that. It just seemed like such a smart idea. I started questioning the wisdom of my normal habit of flying with the bar at high load barely above the stopper. It meant that my fastest response to a gust was to steer toward the kite–not always an option. I had to acknowledge there were times when I flew with the bar well off the stopper to allow me to dump load during turns to avoid slides. The only use case remaining was to take the load off my hands during long tacks. I simply didn’t do it that much. So I pushed the stoppers on my bars out.
Given that I wasn’t moving the stoppers anymore, I reassessed what value they still had. The features I was still using were the spherical shape of the ball to spin the bar, the groove in the ball for the flag line path, and the guide in the block to keep the flag line aligned with the groove in the ball. The flag line guide in the block has always been the most fiddly part of the moveable stoppers. The stopper can rotate relative to cleat knocking the flag line guide path out of alignment with the cleat. You can twist the block into alignment with the cleat but it will drift again. So the ball needed to stay, but the block could go if I could think of any way to improve the guide path.
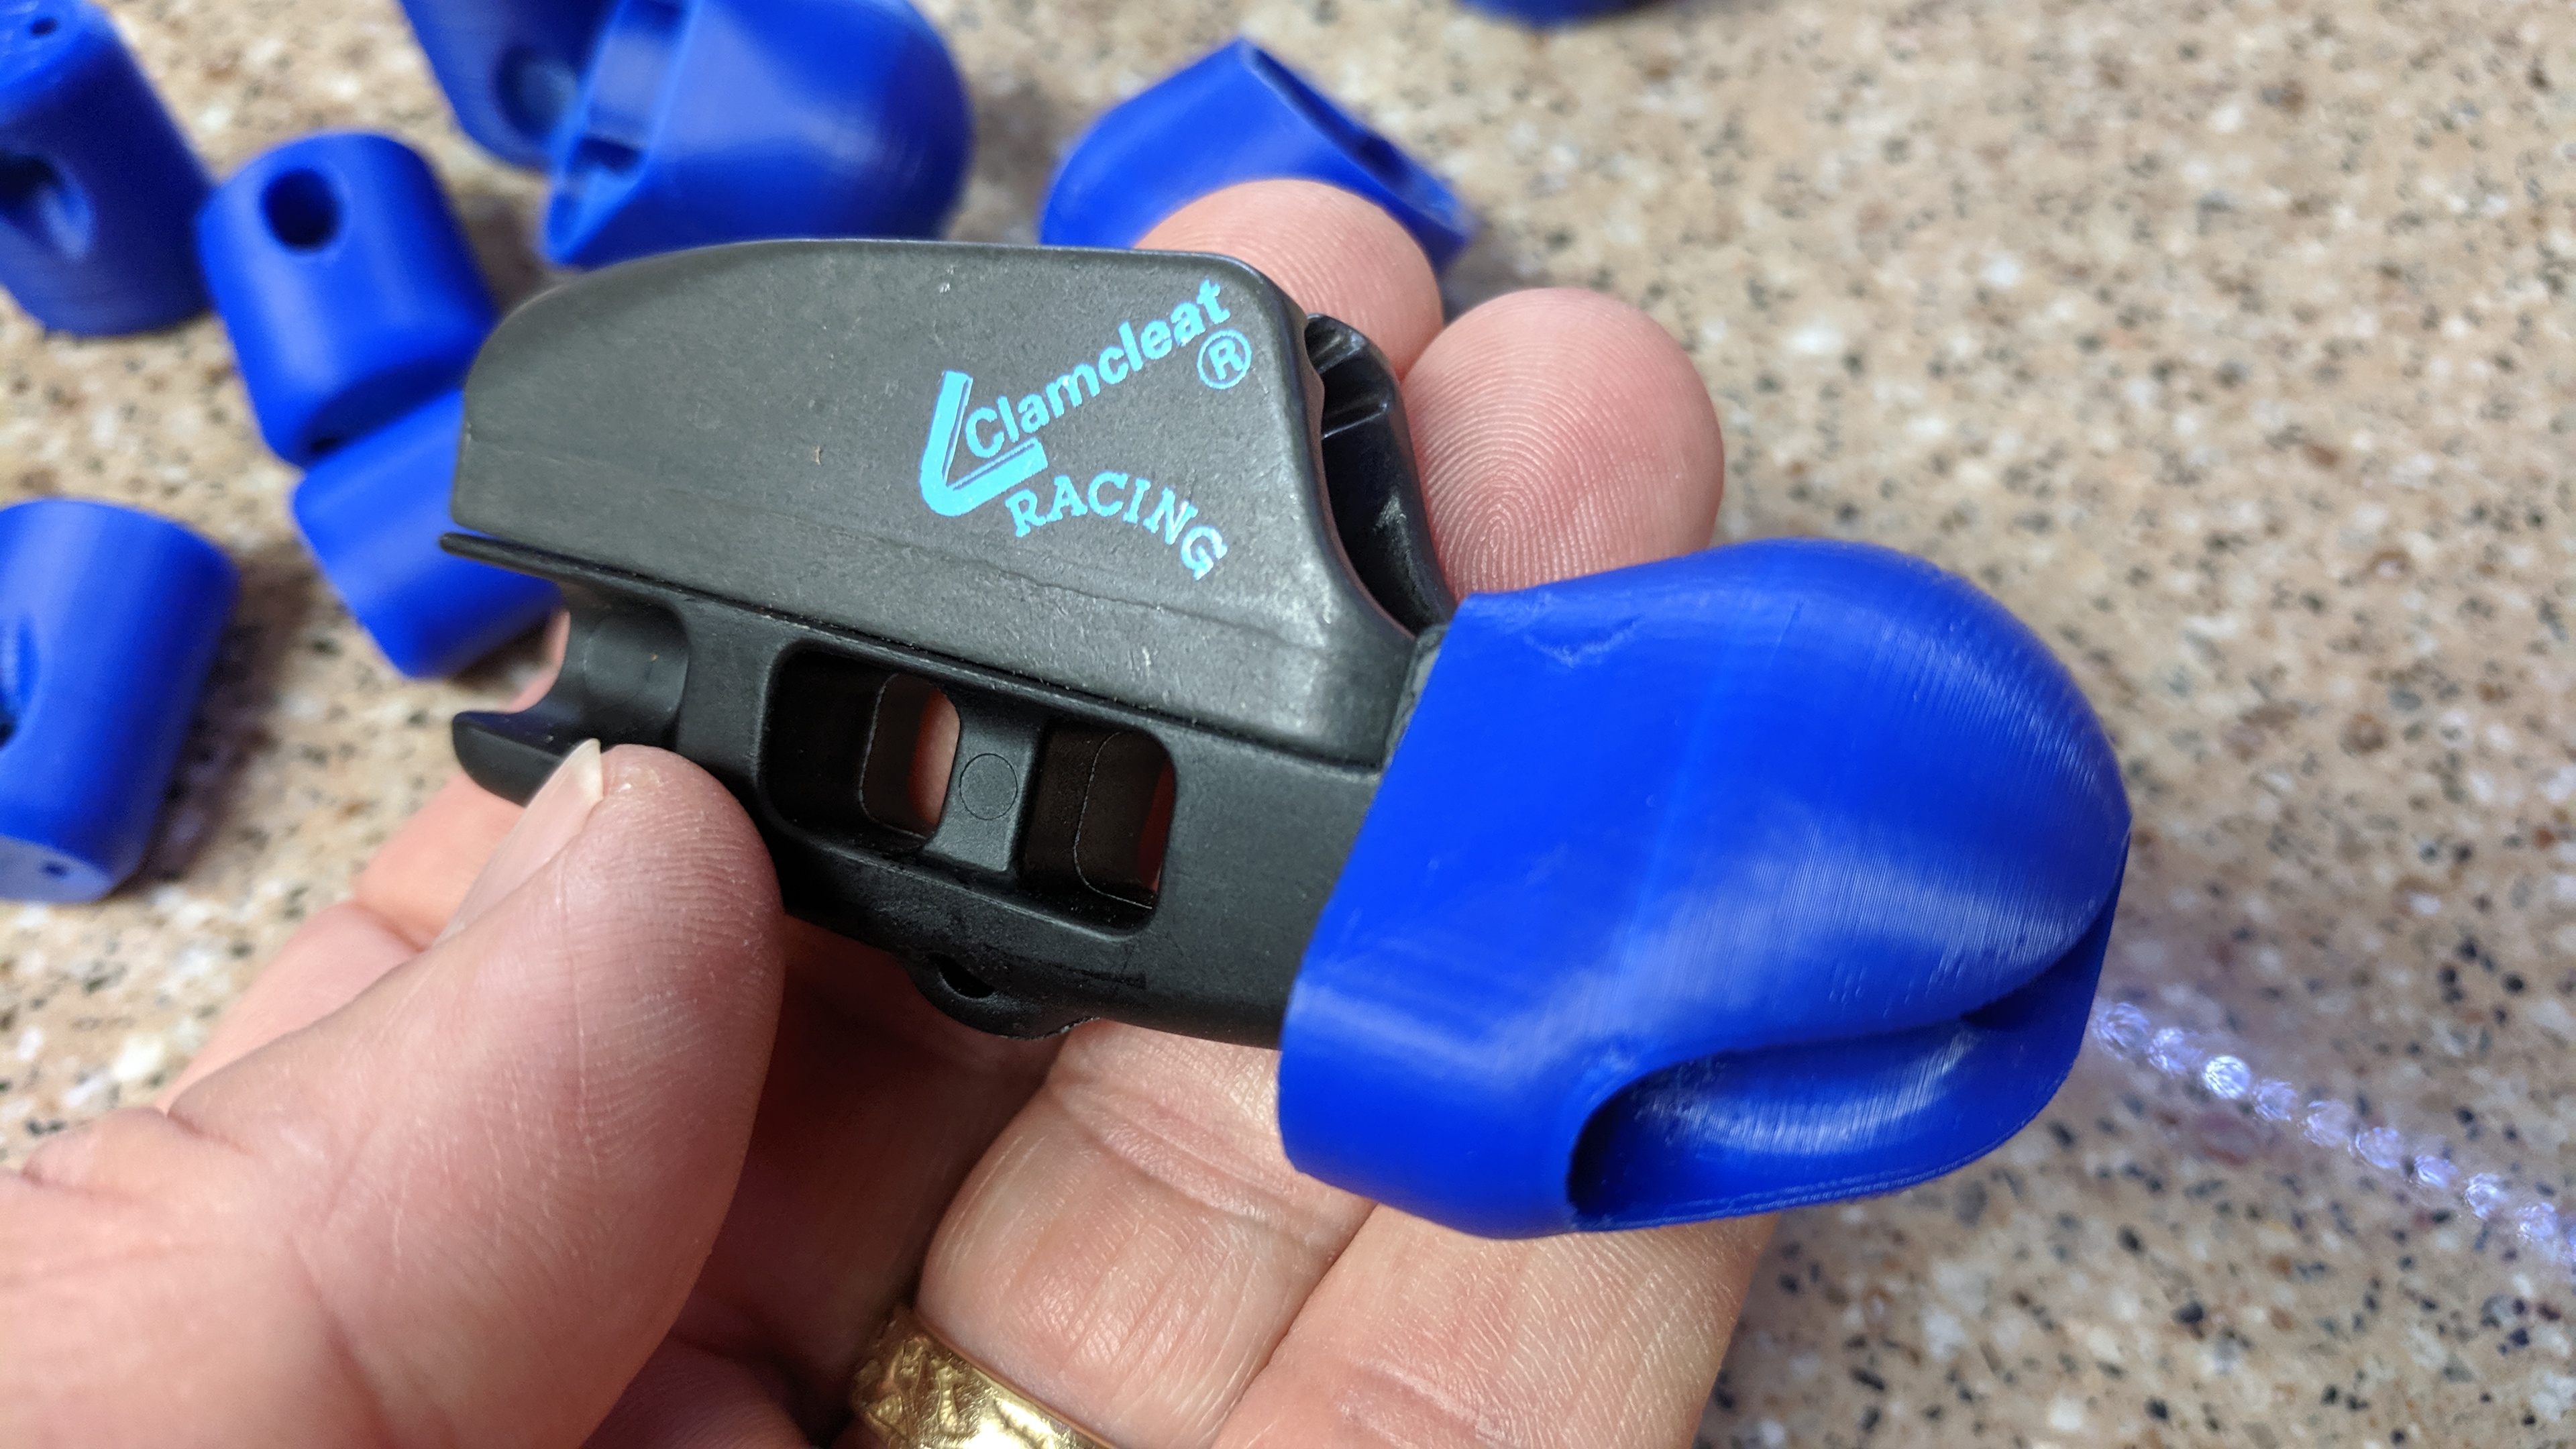
It wasn’t long before I decided I wanted to integrate the ball into the end of the cleat. If I could control the ball’s rotation relative to the cleat I could make a really good flag line guide path. I had done solid modeling using subtractive volumes and realized that subtracting the volume of the lower end of the cleat from a sphere might provide the shape I needed. I created a 3d scan of the cleat and did just that. With some iteration, the sphere flared to more of a helmet shape, grew a little in diameter, acquired an integrated flag line guide path and a tight fit onto the base of the cleat. The picture below is one of the first few prototypes.

Flight testing
I was finally able to test the cleat bead at JIBE this past May. I logged about 13 hours of flying with this stopper replacement on two different kites. As a passive device, the bead did its job perfectly. I never had to adjust it in any way. The bar spun freely with the flag line in the groove. Every flagout was perfect. The bead didn’t snag the flag line or need to be adjusted afterward.
The bead is not likely to ever move. My use of a 3d scan of the cleat end provides a tight initial fit; you have to push hard to install the bead on the cleat. When the bead reaches the right position, you can feel it lock into place. Movement is further restricted by the tight fit of the trim line through the bead. This reduces the risk of the bead shifting around the cleat end and adds friction when the bead is pulled away from the cleat. The bar also tamps the bead back onto the cleat every time it is released.
The best part of the bead is that it facilitiates a more nimble, more responsive style of flying. At JIBE I fully embraced a hands-on style of flying to maximize my responsiveness to gusts and course changes. I set the trim so that the bar was at mid-throw when the buggy would start to slide at full speed. This allowed me half of the bar throw to sheet in and half to sheet out when going at full speed. I had plenty of bar-out to relieve pressure when needed and enough bar-in to do a partial stall. The bar-out was useful while starting, stopping, responding to gusts and arresting slides. The bar-in was useful for lifting me out of the buggy when it was time to hop out of the buggy.
Yet the scenario where I exploited the travel the most was in course changes at speed. The winds during JIBE were more northerly than usual this year. That gave us access to the north end of the island via Driftwood Beach–an eroded maritime forest of Live Oak and Cedar that is now part of the beach at low tide. The beach also had significant runouts draining the backside of the bars this year. Combined, these made for the most technical flying I’ve ever seen at Jekyll Island. The path through the runouts was not always clear or constant. As the tide dropped and the water drained, the best spot to cross the run out would change. If you were going fast and found yourself in the wrong spot, you had very little time to change course to reach a better spot. Driftwood Beach provided similar challenges; there is no straight path through it. The long-dead trees form a field of stobs that threathen your tires if not your health if you hit them. So you have to take a few curves to get through Driftwood Beach. If you are going hard you can’t afford to slide amidst the stobs. Dropping a kite isn’t much better.
To route through the stobs and runouts, I found myself sheeting out when I had to cut upwind. This reduced my line tension and prevented a slide. Once I was around the obstacle I usually had to turn downwind again to reach my new line. To keep from overrunning the kite, I’d sheet in hard to stall the kite a bit and force it to fall back in the wind-window. Once the kite was repositioned in the window, I’d sheet in rapidly to return to cruising on a reach. I needed the full range of bar travel to make this work. Replacing the moveable stopper with the bead makes this more viable as the bead is much smaller than the stopper. Replacing the stopper with the bead increases the bar throw by 6 cm. That might not seem like much, but it means 12% more bar throw on my typical bars.
I’ll acknowledge that holding the bar at all times does not lend itself to kites with high bar pressure. Flying with my 13m Venom was more of a strain than the 12m Phantom II. I found myself switching hands on a regular basis, but the added manueverability and safety margin were well worth the inconvenience. I’ll be replacing the moveable stoppers on all of my bars to get the added freedom the bead provides.
Where to get it
If you’d like to try out the cleat bead, the 3D model and high resolution STL files are available at https://github.com/pbchase/kite_bar_parts. The bead is designed to fit the Clamcleat® CL826-11 and a doubled trimline of 4mm Amsteel Blue. The flag lines I have tested it with are made of 1/16” Ultrex 12 with a 2mm bungie as their core. Be cautious if using fatter flag lines as they have not been tested and could present a higher risk of snagging when flagging the kite.
